VIDEO: Wheels & Tires for Sprites & Midgets
In this video, Classic Sprite and Midget technical expert Brendan from Spridget Mania goes over the tire and wheel sizing that's appropriate for Austin-Healey Sprites and MG Midgets from 1962 to 1980.
See below for tires, wheels, and accessories from this video available from Spridget Mania.
VIDEO TRANSCRIPT:
Brendan MacRae: Hi gang, its Brendan from Spridget Mania, and today we're going to do a quick video that will hopefully answer all the questions you have if you've ever worried about what wheels and tires are going to fit on your Sprite and Midget. It's a question that we get all the time, and we finally decided to put together a video that will help. Hopefully, it will answer all the questions you might have about tire sizing and what's appropriate for your Sprite and Midget.
This is my 67 that I'm working on right now. As you can see, this one already has the stock disc wheel on it, and it has a tire on it. What we're going to do is we're going to go through the tire sizing, and we're going to go through what backspacing is, and then we're actually going to take some different sized wheels and tires and we're actually going to fit them on here. We’ll show you what the end result is, and that ought to give you a really good handle when you go to order wheels and tires for your Sprite or Midget, so follow along.
Now, in case you've never seen it, this is what originally came on the Sprites and Midgets from the factory, okay? This is a disc wheel. Obviously, some of them came from the factory with wire wheels but this is the steel disc wheel, and it is a 13 x 3.5. This is, believe it or not, the original spare tire for my car, and it has the original Dunlop gold seal c41 bias-ply tire still on it. Still got a lot of tread as you can see and of course, back in the '60s and even though a lot of the '70s, tire technology was still using the nylon cross-ply or bias-ply tires instead of steel-belted radials which came later.
That's what these tires are and so they're very different than a steel-belted radial. They're not as strong. They don't do as well in cornering because you basically get a lot of lateral movement in a bias-ply tire. This particular tire is a size 520-13, and as you can see, it's a bit of a pizza cutter. It's a very thin tire. This is the same tire that they used on both the wire wheels which was a 4 x 13 and on the steel disc wheels which are 3.5 x13. That's what the original wheel and tire combination would look like. It came on the Sprites and Midgets from the factory.
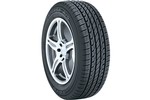
Nowadays of course, we do steel-belted radials, and here is an example of a tire that's very close to the exact size that you would get if you were just going to replace the tires and wanted to go with something that had a real original look. This is a 145/80/13, and as you can see, it’s very, very similar in terms of the width and the sidewall height to the original gold seal wheel. Now, we talked about the sizing there and we talked about three different numbers.
You've got 145/80 and 13, and if you're not really all that familiar with the way that the tire sizing works, the first number to 145 is the number of millimeters wide that the tire is. 145-millimeter wide tread and then the next number 80 doesn't represent a specific number in millimeters or anything like that. It's actually a ratio. On this particular tire, this tire has a sidewall that is 80% of the width distance, okay? The 80% number of the 145 is the height of this sidewall and then, of course, 13 is because it's a 13-inch diameter tire.
There's something I want to show you. It's important to remember that just because you have two tires that are 80s it doesn't mean that they're going to be the same size. Again, because it's an aspect ratio that you're talking about. It's not a fixed number of any kind. Right, here we have a 155/80/13 and right next to the 145, as you can see, 155 is taller by quite a bit actually. The reason for that is because of course, this is a 155 and 80% of 155 is a larger number, okay? 280s next to each other are not necessarily going to be the same size tire.
In this case, the 155/80 is going to be slightly taller than the 145/80. We have another tire here. This one is a 165. This is a 165/70, so this one has a slightly more narrow sidewall, okay? It’s a little thinner here but it's wider here. If you compare it to the 80, it's wider in terms of its tread but it is going to be a little shorter again because this is a 70 series tire and this is an 80 series tire. What we're going to do with these tires is eventually, we're going to get these mounted on some rims which I'm going to show you in a second, and then we'll fit these actually onto the rear of my Sprite.
The reason we're going to mount them on the rear is because that's the place where you have the biggest issue in terms of fitment. If you have a Bugeye Sprite, you don't have as much of a problem because you have the round wheel arch. If you have 72 Midget that has the round wheel arch. It’s not as much of a problem, but if you have the squared-off wheel arch in the back like most Sprites and Midgets have, that's where you have the rubbing issues. That's where you have the fitment issues, especially if you’re bottoming out your suspension or what have you.
What we're going to do is we're going to mount these different size wheels and tires and then we're going to fit them on here, and it’ll give you a much better impression of the type of wheels and tires that will fit your Sprite and Midget. Okay. Well, I'm going to show you some aftermarket wheels here and we're going to talk about our offset or backspacing. This of course is a crucial thing to understand if you want to find out exactly if a wheel and tire combination is going to fit on your car.
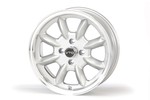
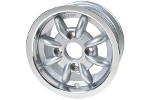
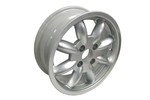
Now, we've got three after-market Minilite style wheels. The Minilite style wheel is probably the most popular aftermarket wheel that you're going to find on The Sprites and Midgets. It's probably the most popular aftermarket wheel you're going to find on all British cars put together. We've got three different sizes here. This is a Minator. It's a Minilite style wheel, and this one is a 5 x 13. Then we have one right in the middle. This is a VTO Classic 8, another Minilite style wheel, and this one is a 5.5 x 13. Then finally, we have another Minator, this one right here, and this one is actually a 6 x 13.,
Now, we're going to talk about offset. What does offset mean? Well basically, offset is going to be the measurement for where the back of the mounting flange is offset from the centerline of the rim. Basically, what you're looking for when you're trying to tuck a wheel underneath or inside a wheel well, or underneath a wheel arch is you want to have a positive offset. A negative offset is going to take that mounting flange and it's going to move it in the opposite direction.
It's going to go inward, inboard to the car and that's actually going to push the rest of the rim outward, and that's not what you want unless, of course, you're running a racecar and you've got big wheel flares or wheel arches here. In that case, you can do a negative offset, but in this case and for the vast majority of Sprites and Midgets which don't have flares. They just have a factory lip here. You want to have a positive offset because what that's going to do is it’s remove that mounting flange.
That offset is going to move off the centerline, and it's going to basically tuck the rest of that wheel underneath the wheel well, and that's what you're looking for. All of these wheels here have a positive offset. Let's see, we have the 5 x 13. This one has an offset of plus 20, and when you go and you look online or you're researching these wheels, a lot of times, you're going to find a number and it's going to say ET. It's going to say ET +/- and then it's going to give you a number.
This one is an ET and that comes actually from a German word. It's ‘Einpresstiefe’ and basically that's just a German word meaning offset, or insertion depth, or whatever. The ET number on this is going to be plus 20 on the 5 x 13. I think it's almost the same thing on the Classic 8. This one is an ET 19. These have almost a similar number, so one’s 19 one’s 20. Then see on our Minator, on the 6 x 13, this one has a positive offset of +23, okay?
You'll notice that usually, generally, if you all have all things being equal, positive offset, as you go wider on the wheel, usually the offset number gets bigger. Although in this case, not by a whole lot, okay? That's what we've got and that's what the offset is. Next time that you're going to look for wheels, make sure to look for something that has a positive offset. If you have this stock set up, you don't want to get a deep-dish wheel. You don't want to get a wheel where the rim is out here and the mounting flange is way deep inset in the wheel because you're going in the opposite direction there. That's going to push that wheel out. Always get something where the spokes are more towards the outside of the wheel relative to the width of the wheel, okay?
What we're going to do, the next step is I'm going to take those tires that we were showing you earlier. We're going to take the 145, we're going to put that on the five-inch wheel. We're going to take the 155, and we're going to put the 155 on the five and a half, and then I'm going to put the 165. We're going to put that on the 6 by13. We're going to mount each one of them on here, and we're going to show you how much room you've got.
That will give you a really good idea then going forward when you're going to fit your own aftermarket wheels on your Sprite and Midget, exactly how much room you may have. We're also going to take a look at the way that the tires fit on the wheels. We're going to see how much sidewall bulge there might be, or whether or not one tire might be slightly too wide for a rim, or one might be slightly too narrow for a rim. We'll go over all of that because you'll be able to see a few extremes in these three examples.
Okay, well, actually, we have removed the factory disc wheel right here. A couple things that I wanted to talk to you about before we mount up the other wheels and tires. It's important whenever you're going to be mounting the wheels that you have lug nuts that have the correct taper, if they have a taper. Or if they're not supposed to have a taper, that they have a flat face to match the wheel application. Of course, these are the stock lug nuts that you get with the Sprites and Midgets for the disc wheels.
As you can see, it has a radius that actually indexes into a recessed area here. It's counter sunk. It matches the radius on the bottom of these lug nuts. It's important that you do this for all of the wheels, because basically what it does is it spreads the clamping pressure evenly across the surface of each one of the studs. That's important, especially because this is only a four-lug wheel. It's only a four-lug wheel, and it's only 3/8 of 24.
Those are very small studs by modern standards. You want to basically make sure that if you're going to mount wheels and tires on there that you have to make sure that you have the correct radius and correct style lug nut for the application. If you're going to do the stock steel wheels, make sure that you get the correct nuts. That's the radius that they've got. Of course, we sell these on the site, and we’ll put all the part numbers for anything here in the video description.
The next thing that I want to show you, and it's funny because I skipped it until now, but we haven't actually talked about the bolt pattern. Well, what is the bolt pattern for Sprites and Midgets? Well, the bolt pattern is 4 by 101.6 millimeter, or it's basically four inches. It's the distance from the center here to the center here. It's either four inches across or its 101.6 millimeters. I've got a caliper here. Let's see. We got that one set up to four inches. You can see if you toggle it, it's 101.6, and you’ll notice that it is almost exactly from center to center on those two studs, okay? That's what it is.
This, of course, is a stock set up. If you guys have disc brakes or something different, it may not be exactly the same, but the stock set up for the rear drum brakes, that's what you're talking about, and of course, it's the same in the front as well. It's also the same for the Mini Coopers. Okay, so now we're going to fit some minilite wheels, and we're going to see how they fit. Okay, so the first tire that we're going to mount on here, the first wheel and tire combo, we are going to do the 5x13 with the 145/80.
One of the things you're going to notice is that this tire actually is a pretty good fit. It's a little skinny for a five inch rim, but if you'll notice, you can see how nice and flat the sidewall is up against the side of the rim. You don't get a lot of sidewall bulge on this at all. In fact, you get a look that's really, really similar to the original bias ply, because you can easily fit a 155 on a five-inch. You can even fit a 165 on a five-inch if you want, but because this was the narrowest rim, I decided to put the tire that was the least wide on there. No idea what that looks like.
Now, one other thing that I had to do, you'll notice that the plug for the inspection hole for the adjuster, I actually had to remove that rubber plug because if you don't remove that rubber plug, you're not going to be able to mount these aftermarket wheels, because they do not clear that. If you ever wonder what that thing looks like, well basically, it's this little fellow right here. Normally, it goes in that hole right there. We're going to have to remove it.
It's probably a good idea to replace it with something you can probably cut that little top hat piece of it off or find a different plug, a smaller plug, something that lays pretty flat. Basically, the mounting flange wants to go right up against there, so I'm not sure if there's a whole lot that you'll be able to do for that. Let's get the 5x13 mounted, and then I'll show you when it's on there. Okay, here is the 5x13. This is with 145/80. As you can see, it's a pretty easy fit. There's really no clearance issues of any kind really with this set up.
If I go over here, you can see how well tucked in that sidewall is. Of course it's about the same width of the stock bias ply tire. There really isn't anything sticking out at all. It's really tucked up underneath there.
Underneath the lip itself, underneath here, there's all kinds of room. Even if you were to bottom out the suspension by quite a lot, you're never going to touch that sidewall . Never in a million years are you going to touch that sidewall. ? Even if you were going into turns and you had some side to side movement of the whole rear end of the whole third member, I don't think it would be enough to ever have that sidewall contact, that lip. That just gives you an idea how much room you can have if you're just going to do a pretty basic 5 by 13 even with a really narrow tire like a 145.
Like I said, you can also mount 155s or even 165s on a five inch rim with no problem. It just depends on how wide you want to go? It also depends on how you want the sidewall to Look. Obviously, the wider the tire, the little bit more of a sidewall bulge you're going to get. Of course the wider the tire usually the smaller the aspect ratio. The 165 that we have is a 70, so it's not quite as tall as this one to begin with. But because this one stretched out a little bit, it doesn't look quite as tall as the other 80 on the rim simply because it stretched a little bit to get it to go on to a five-inch wheel. But it doesn't look bad. It doesn't really look bad at all.
You could still get more wheel and tire under there for sure though. Now, we're going to go when we're going to put the VTO on there. We're going to put the VTO 5 by 5 on there, and you can see what that looks like. Okay, here is the VTO 5 by let's say 5.5, a five and a half inch by 13-inch wheel. On this particular one, we have a set of Toyo 155/80/13s. It's a pretty darn good fit. I really like how it fills out that wheel well here, but it doesn't look like it's too much. If you take a look at it from this angle, you can see it's not quite as tucked in as the 145, slightly wider wheel and tire combination, but still pretty reasonable. It still is tucked under pretty nicely.
I don't think that you're ever going to have any rubbing problems with that unless you get really extreme lateral movement of the rear end. I wouldn't think so. That one fills up that space pretty nicely. There's a little bit more, a tiny bit more of the sidewall bulge on this one, but just barely, just barely. If you put a 165 on it it'll be a lot more noticeable, but because it's a five and a half, so that they're in-between size, that's a really good option. You still show off a lot of room inside there but yes, that's a pretty good fit. If we take a straightedge, and we put the straightedge across, and we bring it up, you still go well behind there. In fact, I would say, “Well, you've got at least a quarter of an inch, a little bit more than a quarter of an inch clearance up there.”
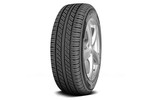
That's pretty good, okay? That’s pretty good. We shouldn't have much of a problem with that at all. Okay so, that’s a Toyo Tire. It’s a 155/80/13 and it's mounted on a VTO 5.5 inch by 13 inch Classic 8 wheel, is what they call their Minilite style. That's a pretty good fit. Okay, so the last of our three-wheel and tire combos, this is a Minator 6x13, and this is mounted with an Achilles 165/70/13 tire. As you can see, it really fills up that space pretty good.
If you do a comparison where you're looking at it, you can see that it sticks out certainly more on the bottom than any of the others did. You can see that for sure. If we were to bottom out the suspension, I have a feeling that if you fully bottomed it out, you might get some rubbing. It's possible that you could get some rubbing if you'd bottomed that out completely. There is a bit more of the sidewall bulge on this. You can see it when you look at it this way. You can see where the sidewall really curves over.
The 145, if you remember, it was like almost completely flat against the very outer part of the rim, but this one, if you take a straightedge and you put it across, I don't even know if it will even touch. No, it doesn't. It doesn't even touch the rim, okay? That’s all sidewall sticking out by 3/16, maybe a quarter of an inch. That definitely has a little bit of sidewall there sticking out. Then, of course, one of the tests that I do always take a little bit of a-- try to get a straightedge that'll sit nice and flat and then bring it up.
You'll notice that when you do it with this one, for sure, this one definitely, if it's laying flat against the sidewall, it does come in contact with that lip. Now, for the most part, I would say for most driving conditions, it's probably going to be okay, but again, it's a little hard to tell with this combination at an empty car. If this car was fully laden and had all the weight in it, it might be a different story.
If you had sagging suspension, if you had a failing leaf spring or you have a lever shock that's just completely gone, and you had this thing really laying really low, I don't know how good a combination that this would be. Do you think that you'd have some rubbing issues? For the most part, the way that it's sitting right now, it looks pretty good. You could probably run this all day long without any problems, but it's the bottoming out of the suspension that I would worry about.
That just gives you an idea of some tire sizes. One of the things I wanted to notice, these particular lug nuts-- these are actually the same lug nuts I used on all three of these wheels, because all of these wheels have a 60-degree taper. In fact, the VTO wheel actually had steel inserts which is a nice feature to have. A lot of guys that have race cars, they like to spec theirs with steel inserts because it just puts a little bit more stronger material where the clamping pressure is going to be.
I think that most wheels that have a flat, they don't have a radius nut. I think that those automatically have a steel insert in them. I know that there are a couple that do which is probably a good idea because those probably need to be clamped a little more strongly. Another thing is that if you're going to take your sprite to a wheel shop and you're going to have them do it, have them mount the tires by hand.
Don't allow them to use a gun on these lug nuts. The 3/8-24 stud just can't handle 100-foot-pounds. It's just going to snap right off. A lot of these guys nowadays they have extensions that they can put on their impact guns that actually will twist once they get to a certain amount of torque. Not certain number of foot-pounds, they'll automatically twist. They won't add any more torque to the lug nut. If they're conscious of that and they're being careful they're using those, that's okay but you can't just womp on these things and put 80 or 90-foot pounds of pressure on these because those studs will just snap right off.
Like I said, they're among the smallest that you're going to see on a car, the 3/8/24. If you've got a race car, one thing you can do is you can upgrade to a 7/16. I think is a 7/16/20 or 7/16/24. I forget what it is now what the standard is but you can go to the larger wheel stud if you're going to do racing and that kind of thing. If you need to torque your wheels better than a street car. Anyway, that's where we're at with this and if you guys have any more questions about wheels and tires or about anything regarding your sprite, you can give us a call. We’ve got the live chat on the website.
You can send me an email and my email is going to be up in the video description. The products that we used here the Minator wheels, the Classic eight, hopefully, all of these tires will be readily available as well. I know that a lot of people struggle to find the correct size 13s and we have three different sizes here that we remand that we managed to get. There you go. Give us a call, email us, and we will help you with anything that you need for your Sprite and Midget.

