Installation Guide for Part# CAML01 - Classic Mini Inner Wheel Arch Liner Kit
Questions? Please contact our specialists by calling 1-800-946-2642 or emailing us here. We are happy to assist you!
Supplies needed:
- Wheel Arch Liner Kit
- Razor Knife
- Drill and drill bits
- Pozi-drive screwdriver PZ3
- Touch-up paint
- Stiff brush, wire brush
- Floor Jack or bottle jack
- Axle Stands
- Lug Nut wrench and security nut adapter
- Waxoyl (optional)
- Rust treatment (optional)
- Pop Rivet Gun (optional)
- Replacement Arch studs (optional)
The wheel arch liner kit CAML01 is designed to fit all classic minis however they do need some modifications to ensure an exact fit. This guide is written such that anyone considering purchasing a set of these wheel liners will understand how well they fit and what is required to install a set.
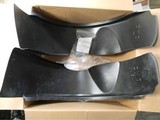
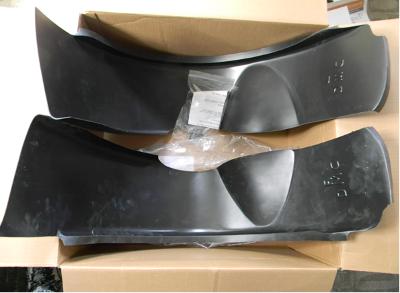
The kit comes with two inner wheel arch liners (labeled L or R which corresponds to the side of the car from driver position), 8 pozi-drive screws, 4 plastic trees, and 8 pop rivets.
The first, and most important, step of this process is to ensure the parking brake is on and the rear wheels have blocks to prevent the vehicle from rolling backwards.
Next, jack up your Mini and remove the road wheels. Be sure to support the car with a pair of axle stands in addition to the jack. Place road wheels under the floor pans as a backup safety measure.
Spend some time removing the dirt and road debris that has build up inside the fenders. If you encounter any rust, treat it with rust treatment before installing these wheel arch liners. It would also be a good idea to spray the inner fender seams with Waxoyl.
If you can remove your wheel arches then it will be a lot easier to install the wheel arch liners. If your arches use studs to mount to the front fenders, use a wire brush to clean the threads before attempting to remove the nuts. Having a few spare arch studs on hand is a good idea as these can get very rusty.
Start with the passenger side first and attempt to fit the corresponding arch liner into the wheel well. The arch liners fit above the shock mount. It takes quite a bit of pushing to get them to slip into place. Be sure to align the small lip at the back of the arch with the bottom of the floor panel.
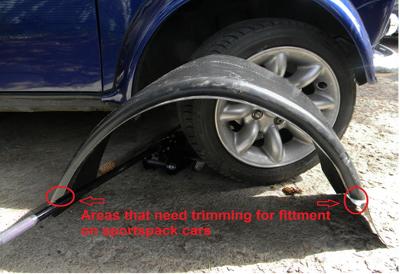
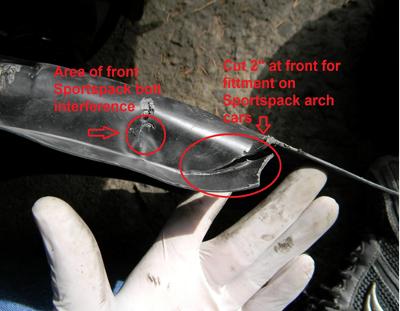
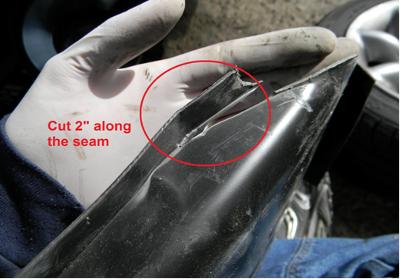
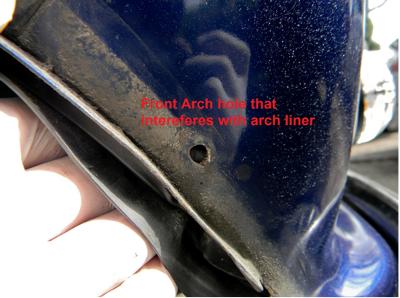
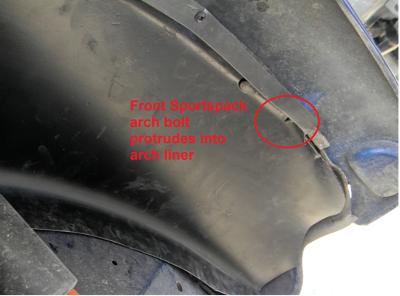
** If you have a mini with Sportspack arches, the arch liners will need to be slightly modified by cutting two inches off of both ends of the arch's wing flange (see photo.) Also, the first wheel arch mounting stud interferes with the arch liner. The arch liner must have a hole drilled out so that this stud can pass through it. (See photos.) **
Once you have fitted the liners, it's time to drill out the holes to install either the posi-drive screws or pop rivets into the fender wing flange. Start at the back side nearest the floor pans and work your way counterclockwise around the wing flange spacing the holes equally around the wing flange. Before you install the pop rivets or screws, put some paint or rust treatment into the freshly drilled hole to prevent rust from starting.
Once you have the holes drilled, remove the arch liner and reinstall your wheel arches, then reinstall the arch liners.
Finish by installing the screws or pop rivets. There are also some plastic Tree plugs to install into the engine bay Filtch Panel to help secure the front half of the arch liners. The holes need to drilled out and the Tree plugs installed wherever you desire to install these. If holes are drilled into the filtch panels, be sure to apply paint or rust treatment to the holes before installing the Tree plugs.
Reinstall road wheels, torque nuts to specs, remove axle stands, lower car to the ground, and test drive to ensure no tire rubbing is present with the arch liners. Cars with adjustable trumpets may need to be adjusted to clear the arch liners. Stock trumpet cars shouldn't have any issues.
Enjoy your new wheel arch liners!