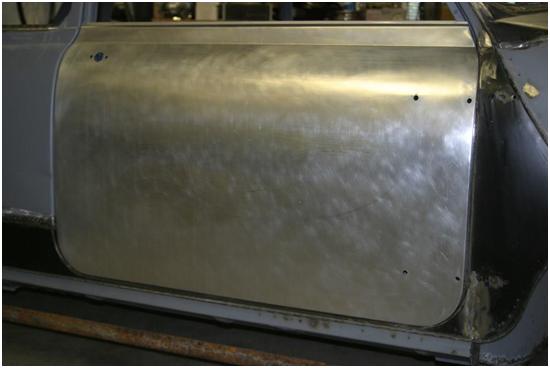
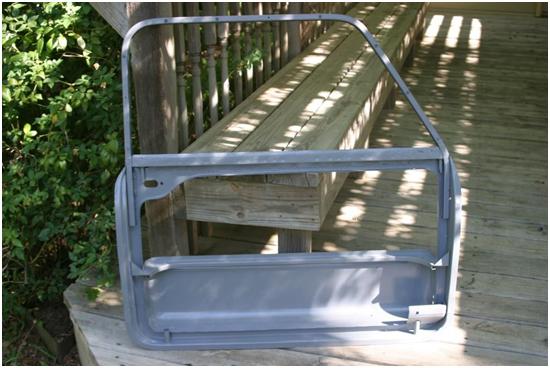
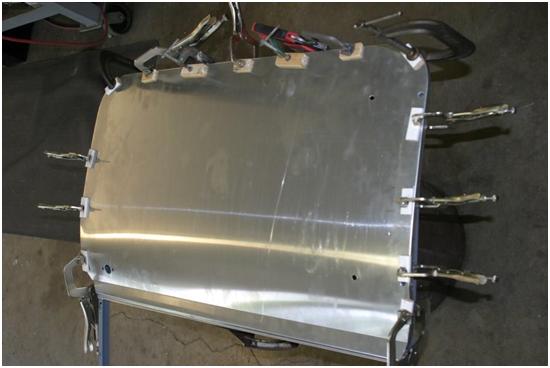
Mk1 Aluminum Door Skin Right Side
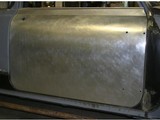
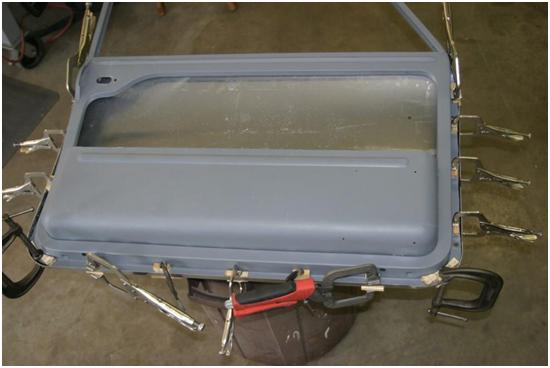
Mk1 Aluminum Door Skin Left Side
Mini doors are known to rust, mostly at the bottom. No surprise. This is so common that in the U.K. there are shops that specialize in repairing Mini doors. Only Mini doors! If you prefer new, Heritage doors for a Mk. 1 can exceed $1000 each, plus shipping of course. Luckily, there are options. Both fiberglass and carbon fiber replacement doors are available and they much cost less. Or you can undertake door repair on your own, saving even more money.
If you are building a race car, you have an additional option in employing the use of replacement aluminum door skins. Check the rulebook first, as most vintage associations prohibit carbon fiber body panels, sometimes fiberglass too, especially in the case of doors. Aluminum door skins patterned exactly as original are both legal and available. They come straight from MiniMania for about $110 each. By re-skinning your doors in aluminum you can knock approx. 13-14 pounds off your car. If you also replace the window glass with polycarbonate, the weight drops further as the poly is half the weight of glass.
Where to start?
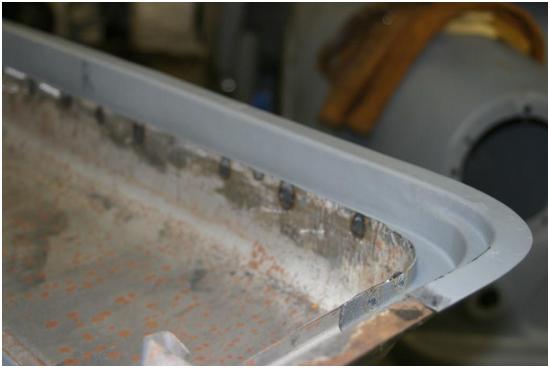
Ugh. If your lower door skin is rusty, the inner panel is probably also a mess. If the rest of the door frame is sound you can buy the lower repair piece for less than $100. Door skins are about $100 each, so a rehabbed door can be quite sound and you’ll be out $500 for both doors, maybe less.
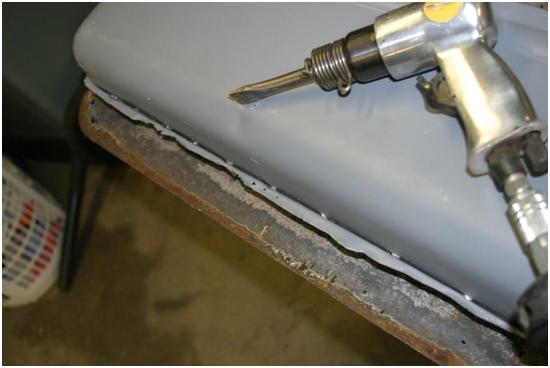
Who can weld? Raise your hand. Seriously, if the lower panel is rusty, a repair panel will need to be welded into place, and carefully at that. The top of the original door skins were brazed at the front / back corners to strengthen and seal them, plus a couple of spot welds were employed on each side. Mostly, they are held on by folded over lips on all four sides. This seam is too hard to pry apart, don’t even bother. Use a hand held grinder to grind or sand through the edge on the bottom and sides – no need to grind the top edge. It only takes about 10 minutes.

In the case of a repair piece, consider:
- Grinding off the lip
- Cutting out the dead sheet metal but only in the affected area
- Trial fitting your replacement
- Tack into place, then you can remove the rest of the old door skin
This way, you can be sure it all goes back together with the same dimensions as it came apart. Having the edges match will make the new skin go on that much easier. Of course, it’s not quite so easy. There are some tack welds on the lower edge of the door pocket to be separated. An air chisel works wonders but then requires a bit of hammer and dolly work to flatten what you chiseled. A bit of air sanding and the door pocket is ready to fit up to your repair panel. Alternatively you can cut away dead metal to then drill out the spot welds from beneath. It takes longer but works fine.
The lower edge will need to be spot welded or drilled and then the holes welded to reattach. Don’t be intimidated, this is not difficult to fit up.
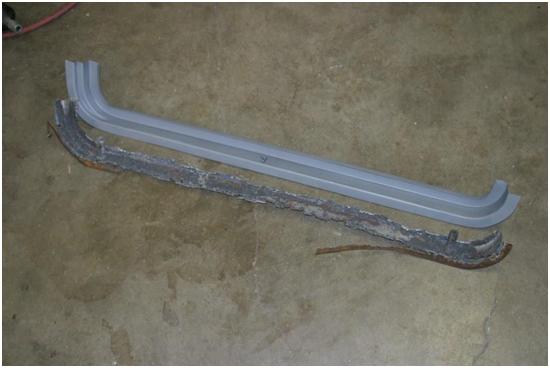
Here’s what came off compared to what will go back on. Out with the old, in with the new!
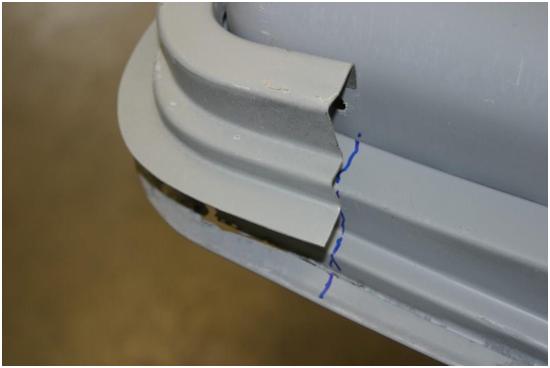
Put your repair piece in place as best you can, then scribe some lines, then you can cut out the old steel with a cut off wheel. Of course care and patience pays big here. If you do a good job, the repair piece will fit just so, butted up to the frame with few if any gaps. Makes welding much easier!
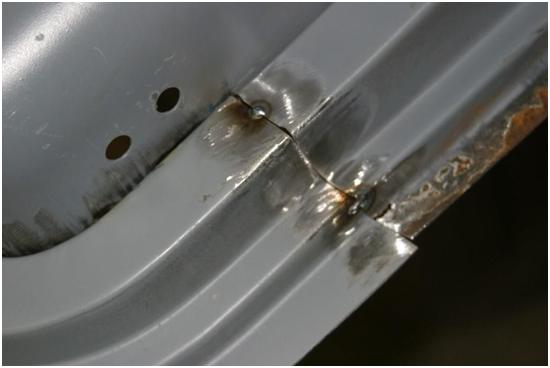
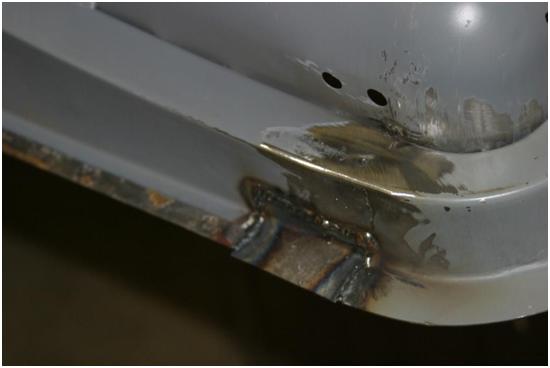
Once you’re happy with the tack welded fit, use a few ViseGrip clamps to hold the panel in place. Then spot weld it in a few places and check your work. If the fit is good, finish spot welding. Then MIG or TIG the butt welded repairs and grind them smooth. A right angle die grinder with abrasive discs works great for this. Here’s an example of a repair where part has been welded and then sanded, while the other nasty weld shows you how it looks before any finish work.
If you want, primer the inside surfaces to keep the rust away. Too bad the auto industry wasn’t onto this in the sixties…
Confession: See the little tubes sticking up from the bottom edge? Those can be replicated with some 5/8” tubing from the Home Depot, holes drilled on the lower edge, then brazed or glued into place. They locate the drain tubes - that rarely work.
Now you have a solid door frame with which to re-skin and you’re only out about $100. No fair counting your labor rate. If you are a pro, you won’t be reading this anyhow.
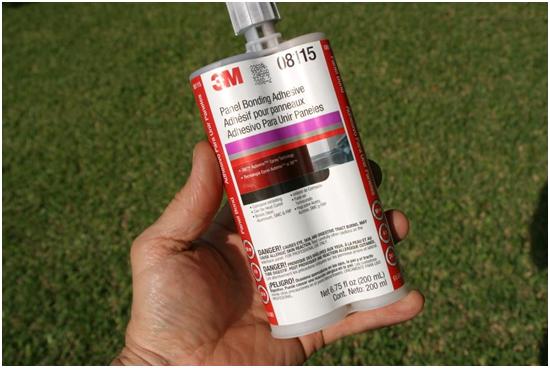
With aluminum, you can use epoxy glue made specifically for bonding panels. With folded over seams and the panel adhesive, no welding is needed. So in a sense, replacing your steel panels with aluminum is easier for us journeymen than the OEM steel!
The newly repaired frame also lends itself to a replacement steel skin, by the way. Not much difference in how the aluminum vs. steel skin goes back on, other than a couple of welded spots on the steel version, rather than adhesive used on aluminum. The folded edges do most of the work.
Here’s the good stuff, 3M #8115, about $50. It’s more than enough for two doors.
The aluminum skins are easy to dent, so use caution moving them around and positioning them on your door frame. Find a soft surface to work on, either old carpet or even carry out your work on the front lawn – although the hammering that is about to commence will sound like an Indian War Party.
Lay the door frame on the skin and position it so the hinge holes line up. You sort of “average” the sides and bottom edge since nothing will be truly parallel, but this will make more sense when you’re deep in it. Round up all the C-clamps and ViseGrips in your neighborhood, as you’ll want to trial clamp the skin to the frame to insure the fit is to your standard. You can’t ViceGrip straight to the aluminum skin though! It’s very easy to dent. Use some pieces of wood to protect the skin, like wooden yardsticks from the Home Depot. They cost .68 cents and you only need about two or three. Some thicker wood blocks are handy to space your clamps out of the narrow channel.
The next steps are:
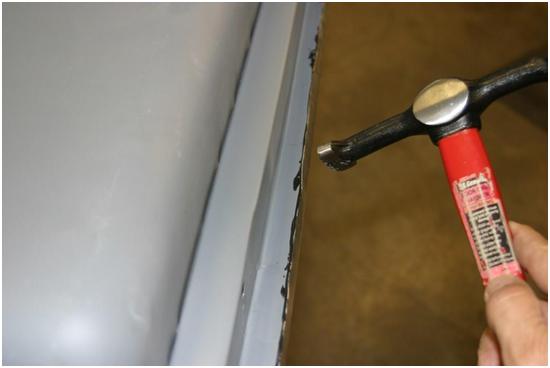
- With a body hammer, work down the top (window) edge from end to end, only tapping down about 15 degrees at a pass. By going back and forth, you’ll prevent any cracks and it’s easier to control a nice sharp lip. Once you have this lip fully folded over you can remove the door skin since it’s now time for adhesive.
- The skin and door frame should be cleaned with acetone or similar so the adhesive can do the job. The epoxy has a fairly long pot life, so no need to hurry. You’ll dab glue into the crevice you just formed on the top edge then apply glue on the face of the skin along the sides and bottom edge.
- You can now work the skin into place and repeat your process of affixing all the ViseGrips, C clamps, etc. Once you’re happy with the skin being firm against the frame, all the way around, it helps to now remove any excess glue that would prevent the lip from being hammered flat, once worked around the frame. Globs of dried glue make for a nasty folded edge!
- Let it cure overnight – without tapping down the remaining edges yet.
- After the adhesive has cured you can remove all your hardware and admire your work. You’re almost there.
- It’s now time to apply adhesive again, this time so the soon-to-be hammered lip has a strong bond to the door frame.
- Now work the edges with your body hammer, back and forth, numerous “laps” to form a nice tidy lip around the edge of the door frame. Take your time, no heavy striking, just a steady tap-tap-tap.
- Once this adhesive has cured, you might need to carefully cut away small bits over overlapped aluminum at the door hinge bolt holes. You want that bolt hole clean and flat so the washer and screw has an unrestricted perch. Take pictures at this point. Be proud!
You will surely qualify on the pole next time your SuperLight Mini rumbles to life!